|
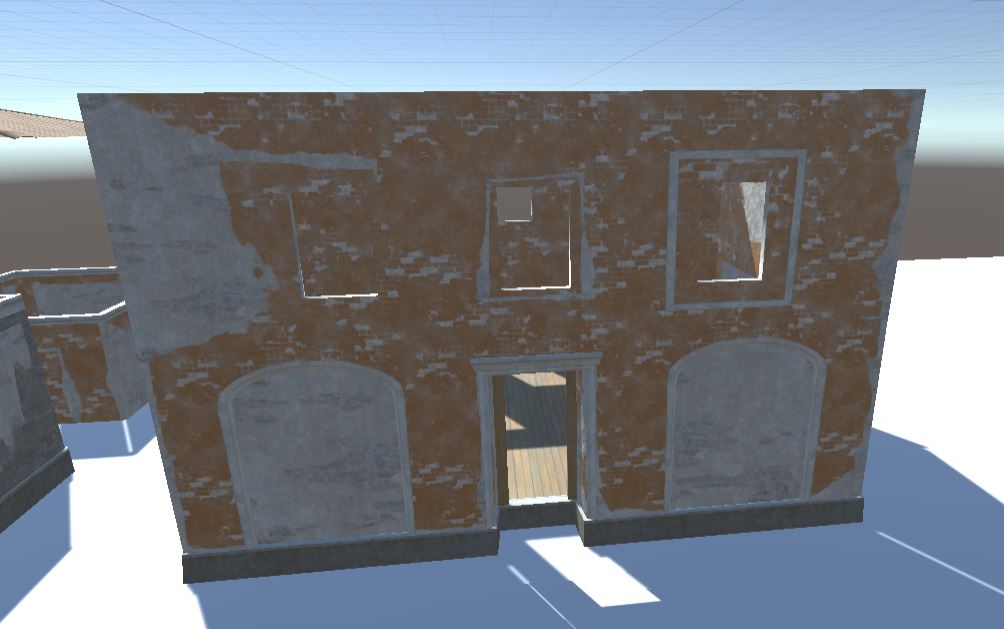
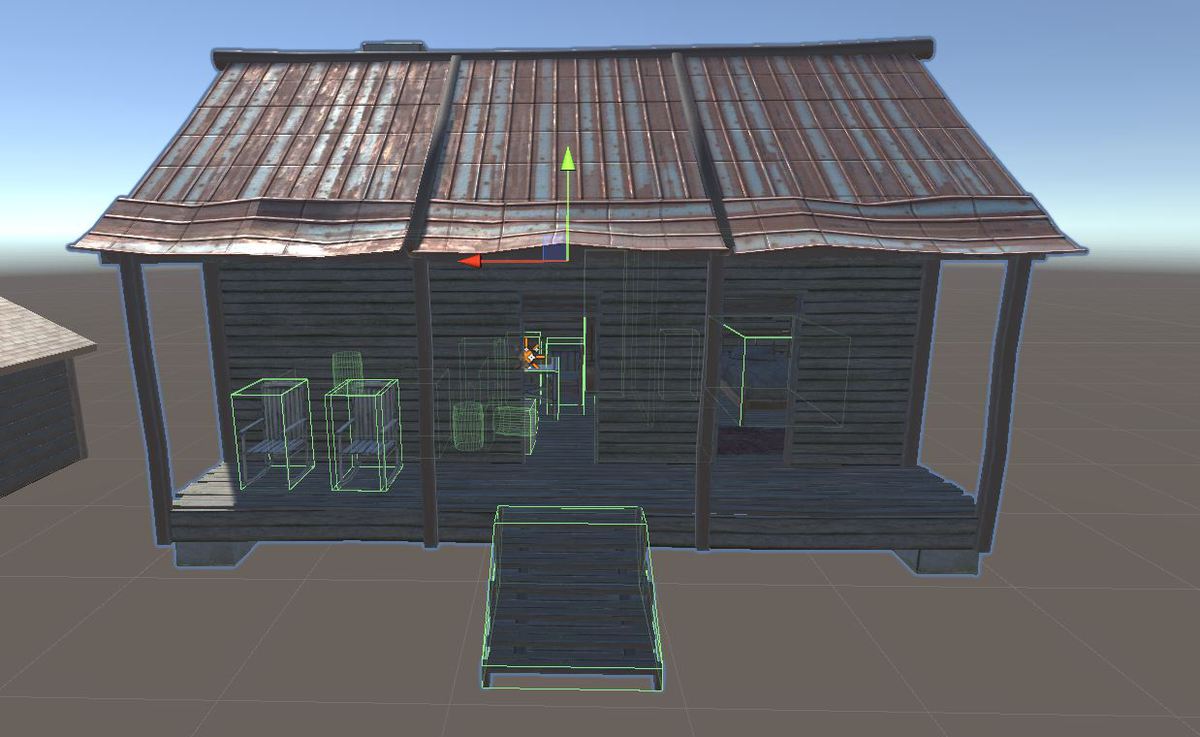
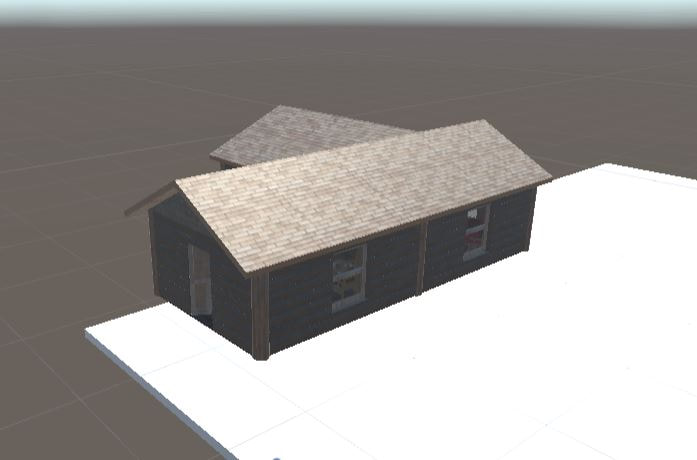
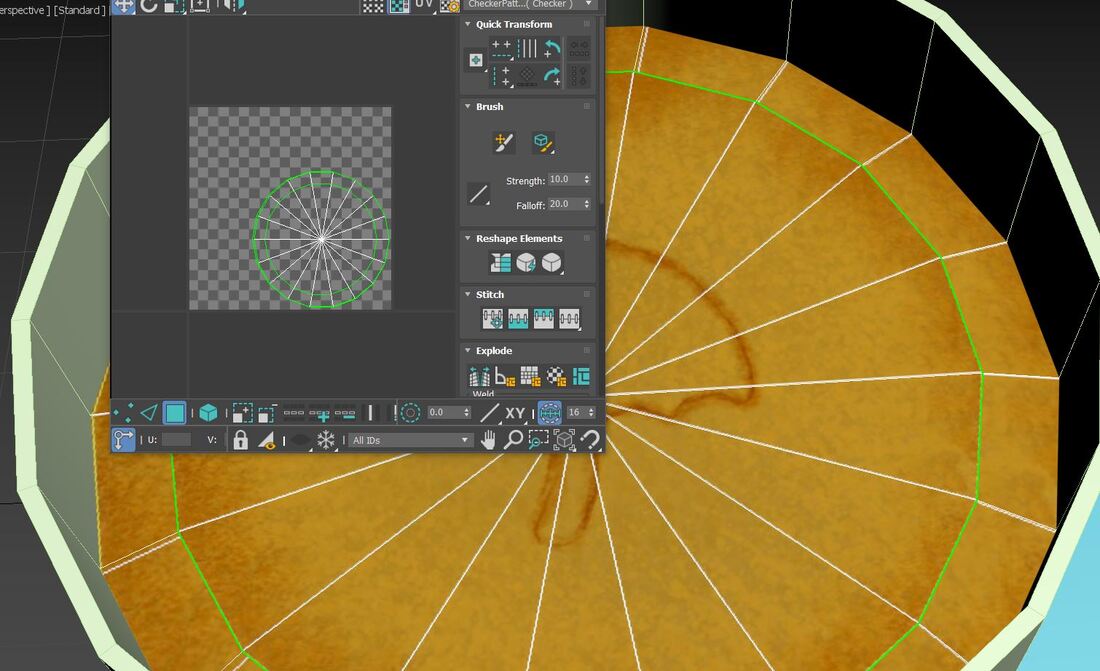
Total terrain transformation. That's probably the best way I can summarize my progress on Unreality this week. As the writer and the 2D artists are wrapping up the flashback animations and making a few last second textures, I've been working in Unity Game Engine to continue adding to the terrain of Unreality. I also worked in 3DS Max to create a basic tent model, which I added to the campsite area. Additionally, I painted the terrain a lot, working with a 2D artist to get a sand texture for a small beach-ish area on the lakeshore beside the campsite. I also worked with the writer to ensure everything matched our team's vision. Within the campsite, I added prefabbed fire pits from the Unity Asset Store and placed tent models in several variations. It still needs some work, but it's something I can finish early this week. This week, I also hope to complete the staff housing area, place street signs, and work with the programmer - who is returning this week - to work on a main menu and pause menu. Perhaps we can even get to working on the mp4 script to play cutscenes. I hope to be 99% done with Unreality by the end of this upcoming week. Although we made lots of progress this week, there was one glaring issue - file size. I was unable to create another playable prototype, which is because the build zip file is too large for Unity Play. I'll have to try to sort that out this week. Wish me luck; I'll need it. It's exhilarating to see our hard work having great results. There's a light at the end of the tunnel - let's just hope it's not a train. 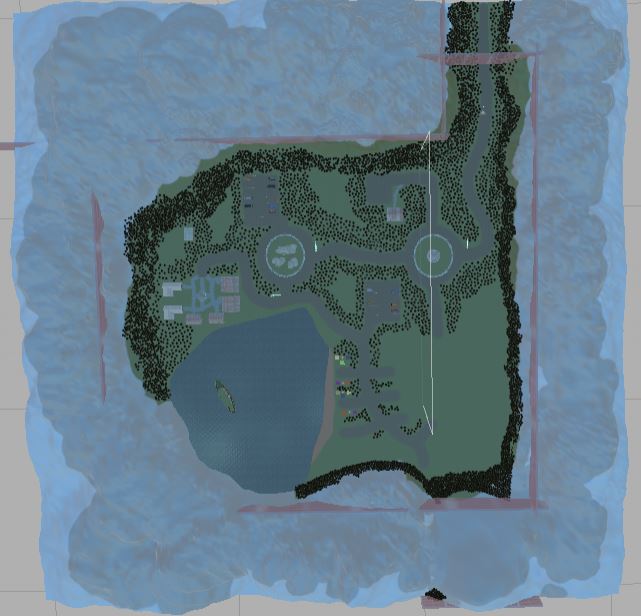 Current progress on the final map terrain
0 Comments
This week, my progress on Unreality stalled a little. While I could, I worked in Unity to develop the terrain and create a system of roads and paths within the game. I adjusted the sizes of objects, cabins, and vans to be more realistic in relation to the player's size. This fits into my continuing goal to work towards a better prototype, and I hope that next week I can finish all terraining and begin to add in flashback objects and easter eggs to the final scene. However, the progress I made wasn't able to be great, as I didn't export my Unity scene to my Google Drive on Tuesday. After AP testing and a case of COVID, I only had one day this week to work on Unreality, which severely hampered my overall work output. I hope to get a lot more done this upcoming week. 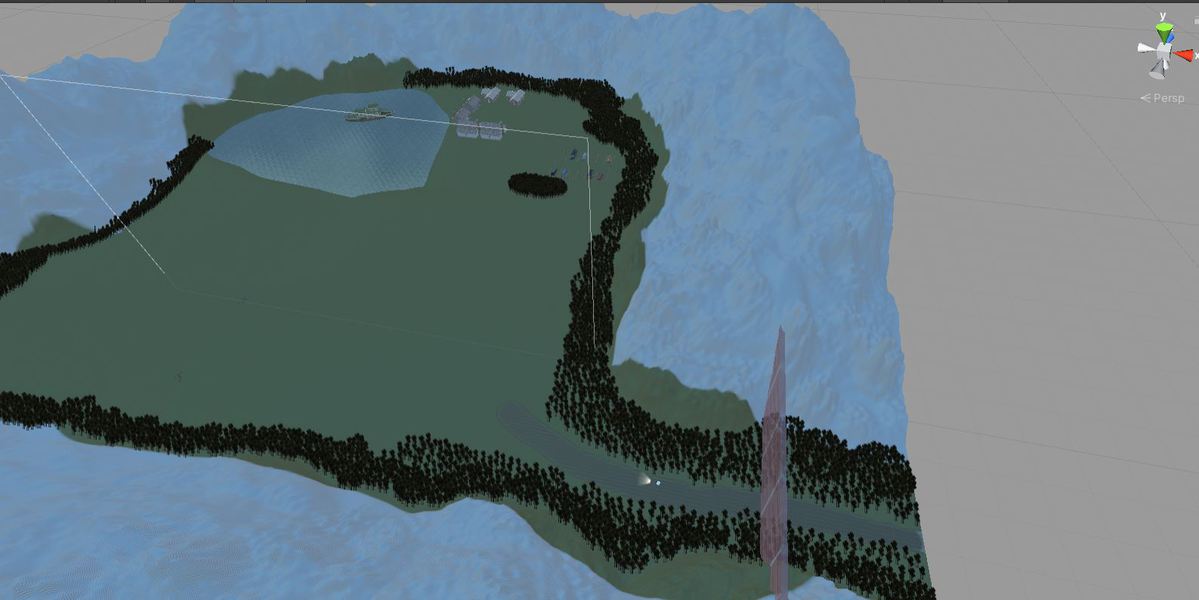 Painting a road onto the terrain
This week, my work was mostly related to the final game scene for Unreality. Without our main programmer for the rest of the year, I'm taking the responsibility of taking his place and assembling the final scene.
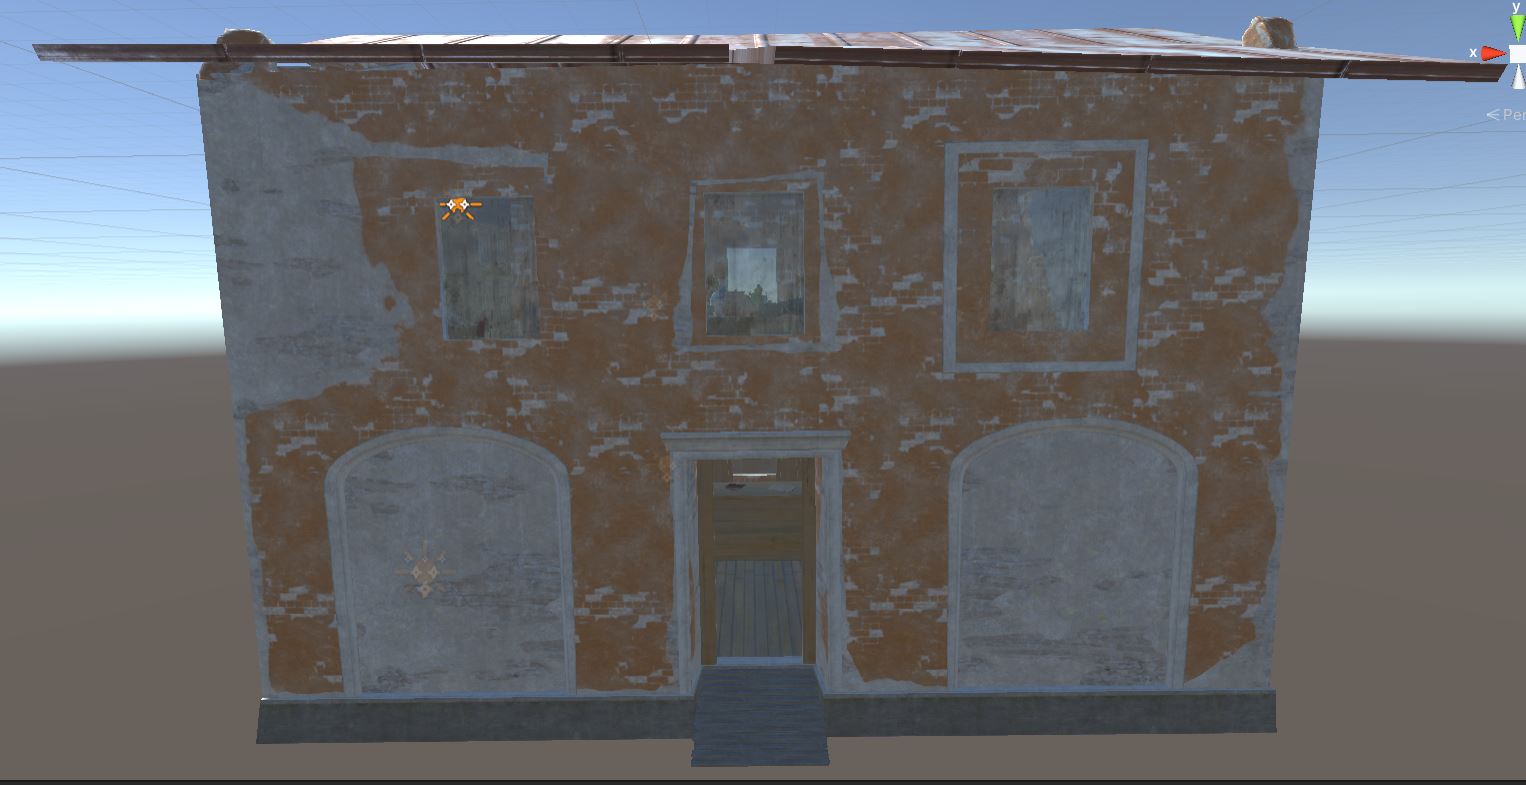
It started with a .gz file. A download from Google Drive of a Unity Package leads to some strange file names, After lots of zipping and unzipping and confusion, I was stuck. How could I open this Unity Package of our final scene? After trial and error, I discovered how: by importing a package of the .gz file. Once I got past that tribulation, I was faced with a new one: the map. The drawn map concept was notably different from what was already in the scene. Through talking with the writer of our group, I was able to settle it and decided to rearrange the scene. After many rearrangements and changes to the scene, I finally played the file itself. Then, I changed the values of jumping and moving vectors to improve movement. Once I had gotten a decent start in the Unity Game Engine itself, I decided to see how the game would work in Unity Play. Making the scene playable in Unity Play gave me plenty of useful feedback. For example, our controls for sprinting (control w) make you close out your current window. Now, we have a published (but far from done!) version of Unreality you can check out yourself. https://play.unity.com/mg/other/unreality-first-playable-prototype For now, I'll focus on continuing to decorate the scene and adding in flashback mechanisms to play cutscenes. I'm looking forward to a progress-filled week. This week, Unreality has teleported seven days closer to the deadline. My work revolved around the park office, the final boss, street signs, and some overall design decisions. I completed my duties for the patrol area of the map scene, creating a park office. I used many different free prefabs from the Unity Asset Store, starting with a rectangular shell of a building and using a plethora of props to decorate the interior and make a fitting park office. I also did some work on the final boss. We made a decision as a team on how the boss fight would work: go into one particular abandoned-looking cabin (which I created this week!) and find the Wendigo boss inside, fighting it to win the game and roll the credits. My creation of the 'Wendigo Hut' was an interesting challenge, as I made sure to make it very abandoned and force the player to both wander around the hut and go in one particular way. This week included a street sign bonanza as well. I created a wooden signpost and some speed limit sign 3D models in 3DS Max. By working with the writer and a 2D artist for signs that match the game's needs and feel as well as sign textures. Now, we can include many scene-appropriate street signs in Unreality. I made some overall design decisions this week, too. Our team is simplifying Unreality, officially reducing the UI, item, and combat system. However, we are still looking forward to a playable prototype coming next week and a successful completed game. From L to R: Before and after Staff Office, speed limit sign design, and Wendigo Hut
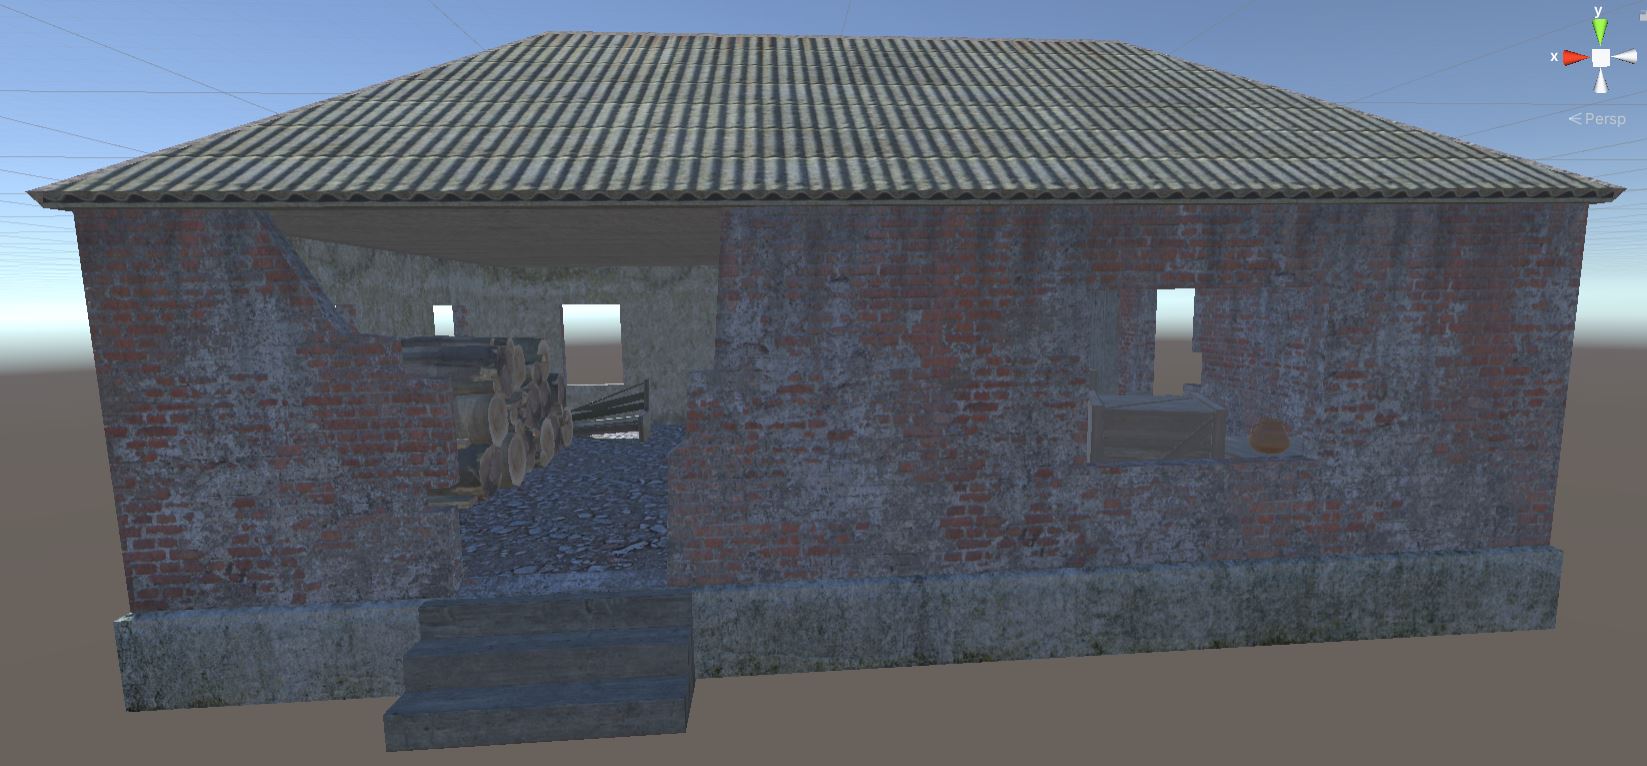
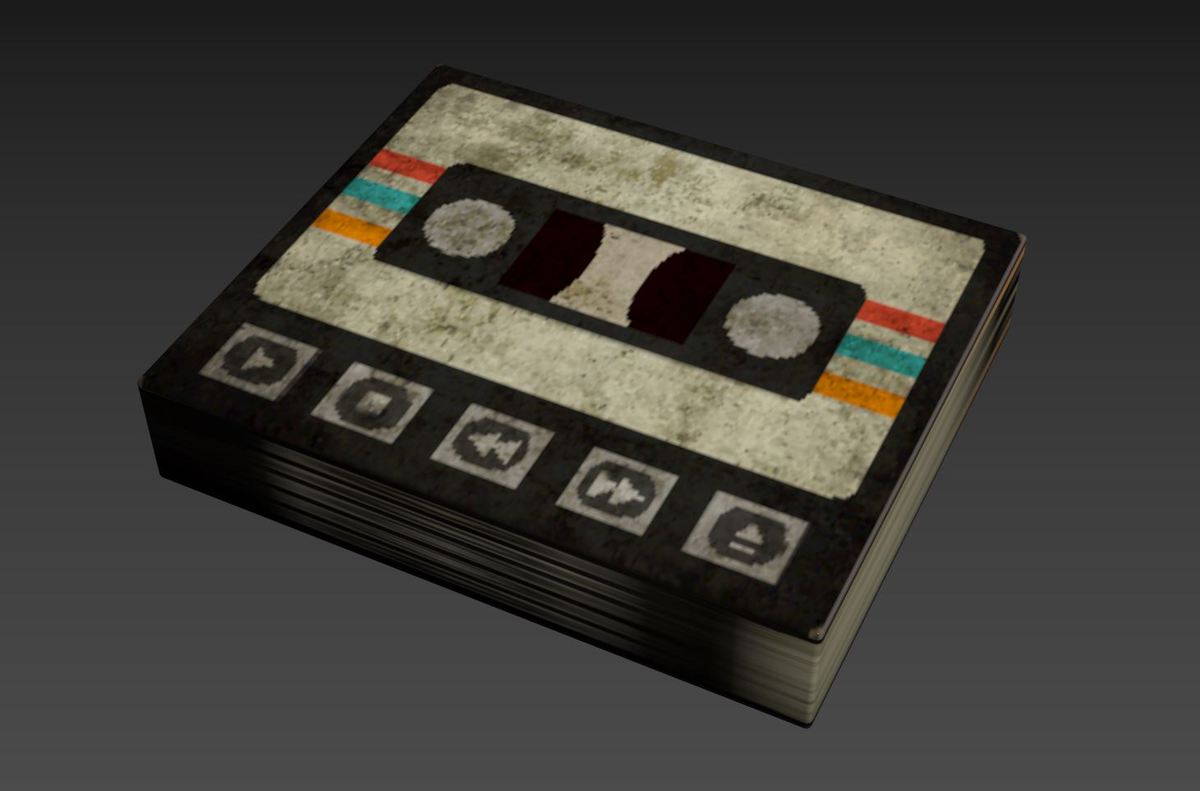
The cabins are done. It's crazy, yes, but it's true. This week, I finished all of the cabin prefabs required to complete the cabin area of the campground scene. Through using free premade assets from the Unity Asset Store along with a few objects made by me, I was able to decorate interiors and create custom prefabs. I then exported these as prefab files to a Google Drive folder, where our group's programmer designed the actual cabin area of the final game scene. Some problems I encountered this week occurred with exporting assets. It was difficult to make sure all the right files - especially meta files - and prefabs were exported properly. The previous week, I exported my entire Unity scene to give the programmer one cabin prefab, but I wisely decided to only do prefab files this week. Additionally, I got another Easter egg done - fitting for the week before Easter. This time, it's a reference to another group's game. Mountain Heart, an audacious game with a hardworking team behind it (check them out here!), will be referenced in Unreality through a cassette tape model. After I figured out how to spell 'cassette,' I used an image from the Mountain Heart group as a reference and a texture for creating a 3D model in 3DS Max. This week, I'm hoping to continue my work on different areas of the campground. I'd like to finish the staff housing area. Next week, I want our team to focus on combat mechanics and UI, so I'd be down to work with them on that as well. I might make some street sign 3D models also. Everything's going pretty smoothly so far and I hope we can continue our work well next week. Cabin models and cassette tape Easter egg
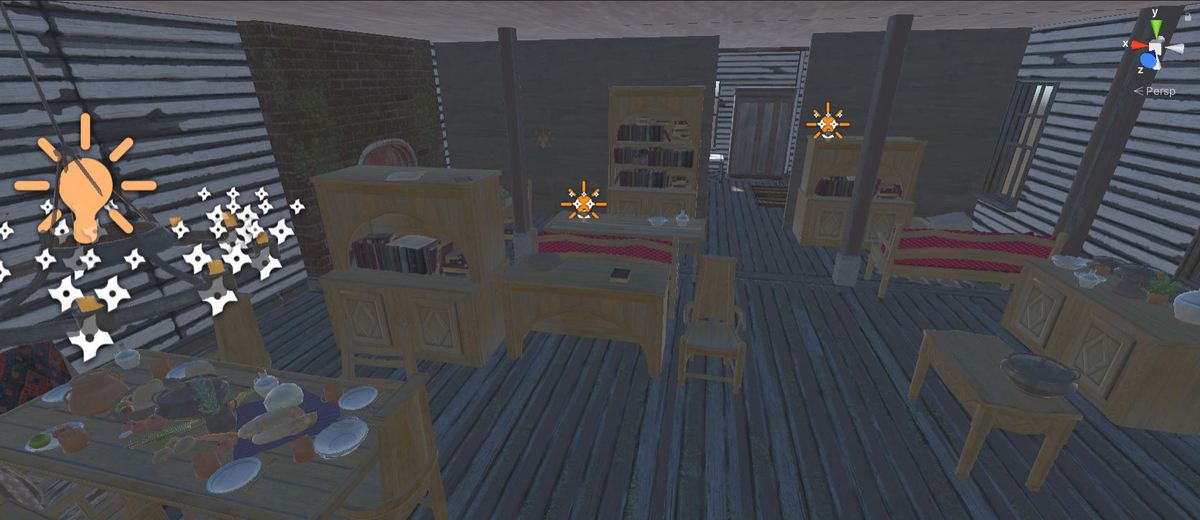
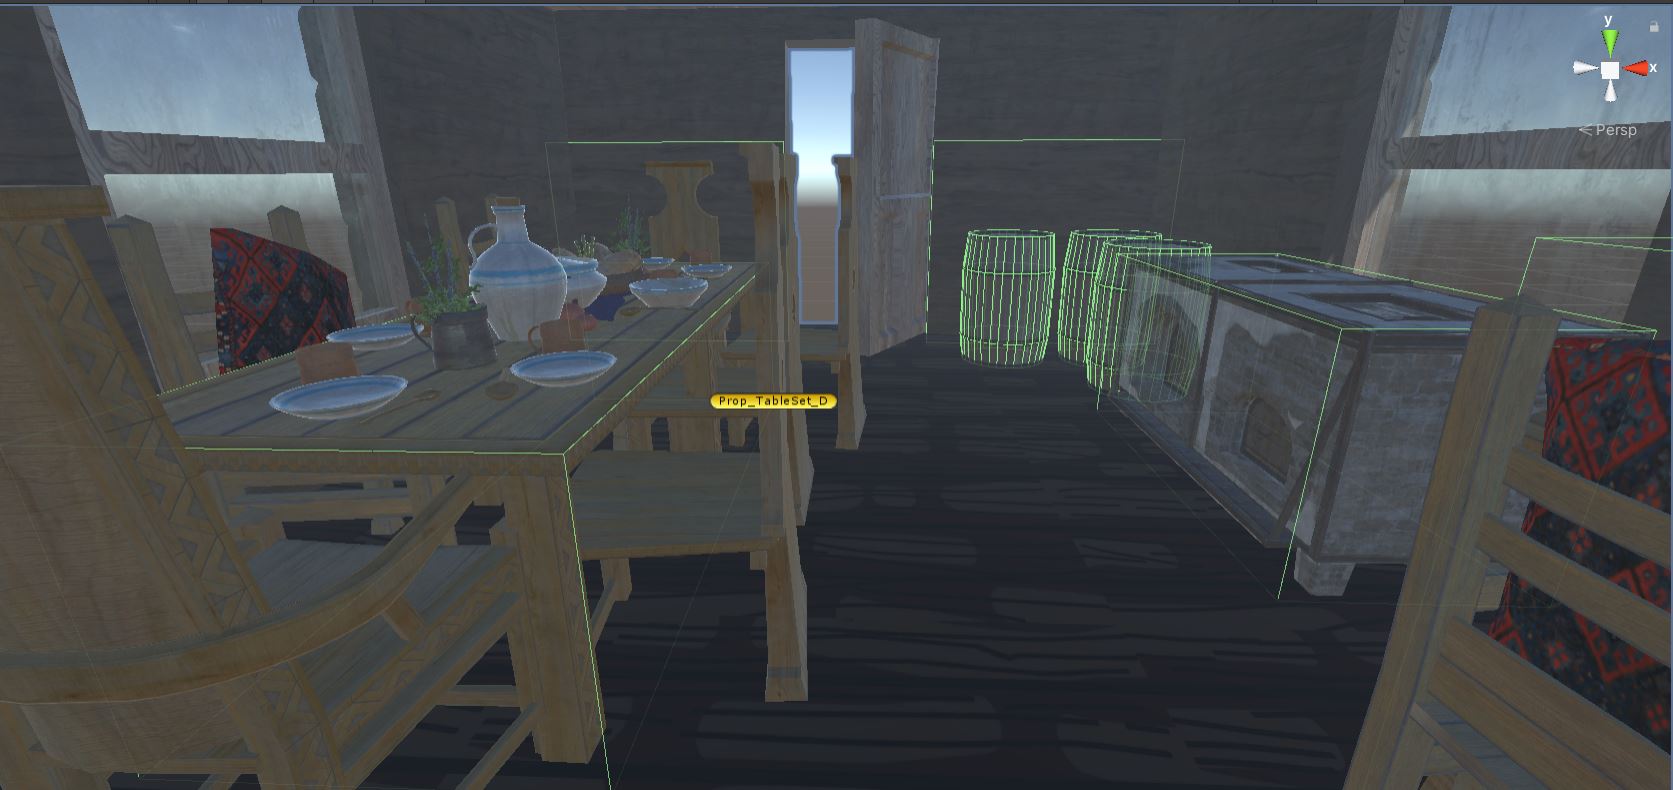
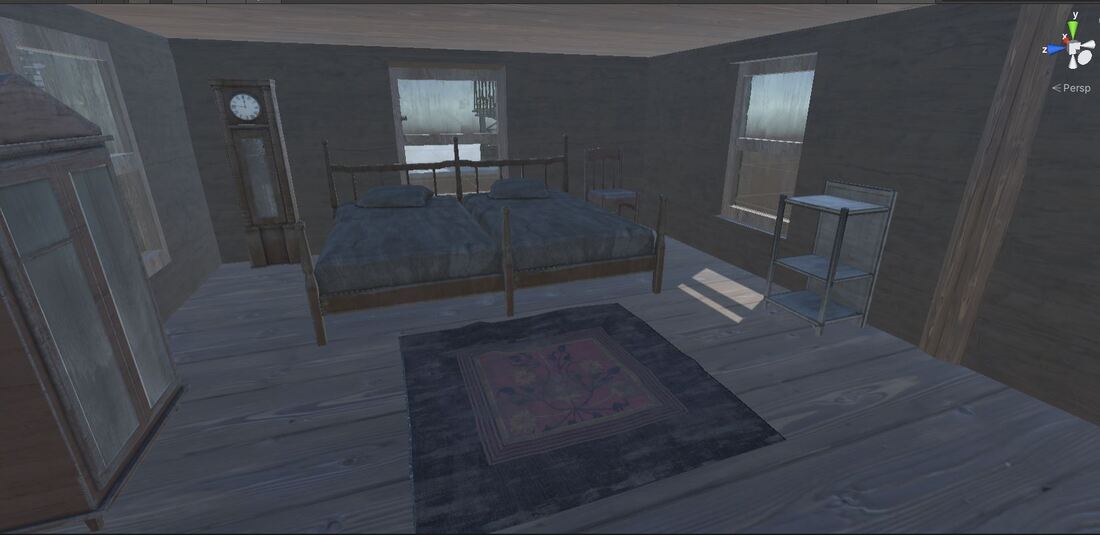
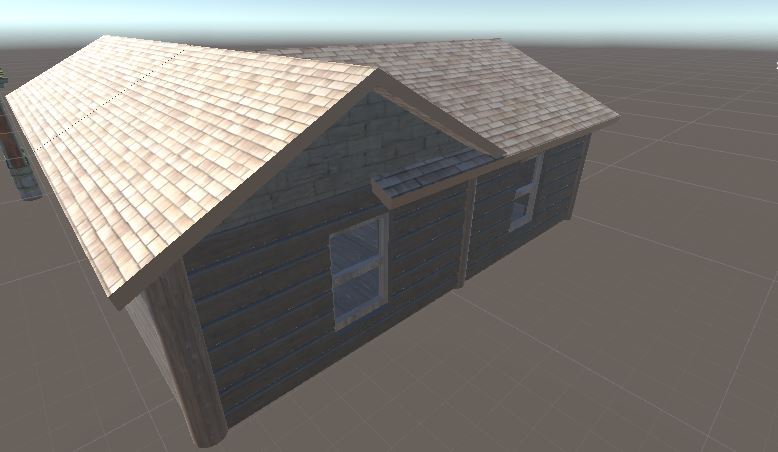
Week six of Unreality has concluded, and we've done our duty towards making a video game. This week, I mostly worked on making parts of our final scene, such as making cabins. I took my Modular House remake from the last check in and added glass to the windows to touch up the exterior. Inside, I added walls and rooms: a dining room at the entrance, a living room, and a bedroom. Using free prefabs from the Unity Asset store and 3D models that I made myself, I detailed the inside of the cabin. A 2D artist helped me out by making a floor/wall texture and I communicated with the team writer to ensure everything I was doing lined up with the overall vision for the game. My work this week fit in to the entire team's work through improving the game environment. Working with the programmer to export prefabs into our finished game scene, working with 2D artists to ensure flashbacks fit with the environment, and working with the writer to create cabins that stay true to Unreality's vision were the methods in which I cooperated with my team. As the team leader, I also did some other things. We decided how we would animate flashbacks: the same artist would animate everything to make sure the timing would be consistent. I attempted to organize our team a little more as well. This week, I had some issues, though. It was difficult to export the cabin prefab as an fbx, as the programmer would have to reapply textures to every single asset in the cabin. Instead, I used export package to export all the assets in my scene, upload them to Google Drive, and have the programmer put the prefab in his scene. Next week, I hope to continue my work on cabin interiors and finish the cabin area for our game. I can't wait to create a playable version of Unreality - hopefully within a week or two. Interior and exterior of a finished cabin
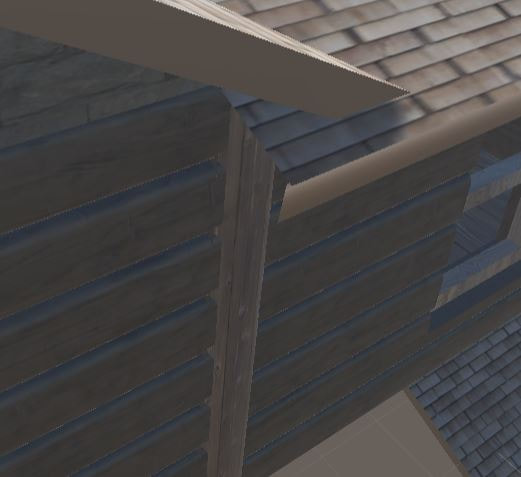
With five weeks of development under our belt, the Butter Cow Games team has made great strides - and I have too. This previous week, I finished almost all of the Easter eggs, became more organized, and began constructing parts of the final game scene. First, let's examine the Easter eggs. I wrapped up most of them using the UVW unwrap modifier and edit polys. Through tools such as extrude and inset, which I have discussed in earlier check-ins, I've been able to make some cool models. Unwrapping objects has let me to give a UVW render to a 2D artist and get a great texture back. UVWs have also been an issue this week, though. When making the dalgona cookie Easter egg 3D model (a reference to the hit TV show Squid Games), I created a cylinder with a slope towards the middle. However, when unwrapping the texture, I only placed the texture of the inner circle separately from the rest of the model - not the outer one! A new texture and some UVW movement afterwards, however, resolved this. I also experienced a problem revisiting the Modular House project, which we did earlier in the year. Importing the .fbx file and the textures proved successful, but there were imperfections in the model when I tried to make a new house with the modular components. By attempting to have an irregular shape, part of the roof would hang down. To fix this, I duplicated the original 3D model and manipulated vertices and faces. Eventually, I got a model that had a more natural-looking overhang. I also spent some time this week organizing my folders and the team Trello. Everything is much easier to find and my team members can more easily navigate our shared planning document. Changing the dalgona cookie UVW map and getting a new texture from a 2D artist Adjusting the model of a roof component of the modular house My progress from this week fits into the overall team progress as we move towards cutscenes. As the 2D artists, the programmer, and the writer are busy with creating, importing, and directing animations, I can make some scenes. I did a little bit of prefab preparation on Wednesday and Thursday, and I will make that my main focus when we return from Spring Break. I aim to decorate some cabin interiors and make an RV park layout for the programmer to put in the final game scene. I can't wait to keep seeing the team's vision continue.
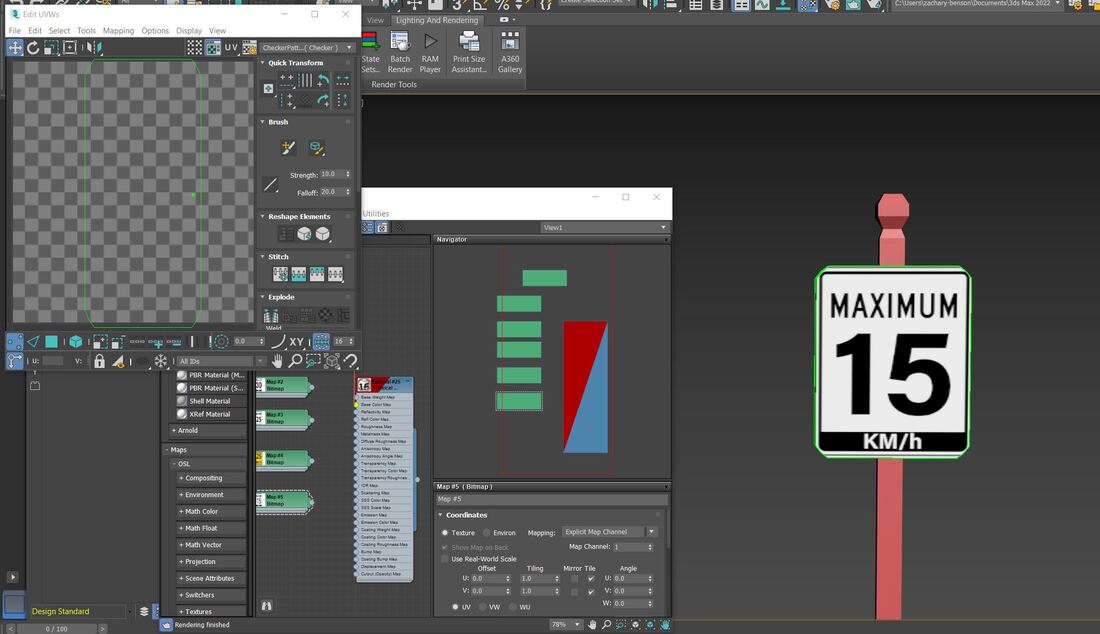
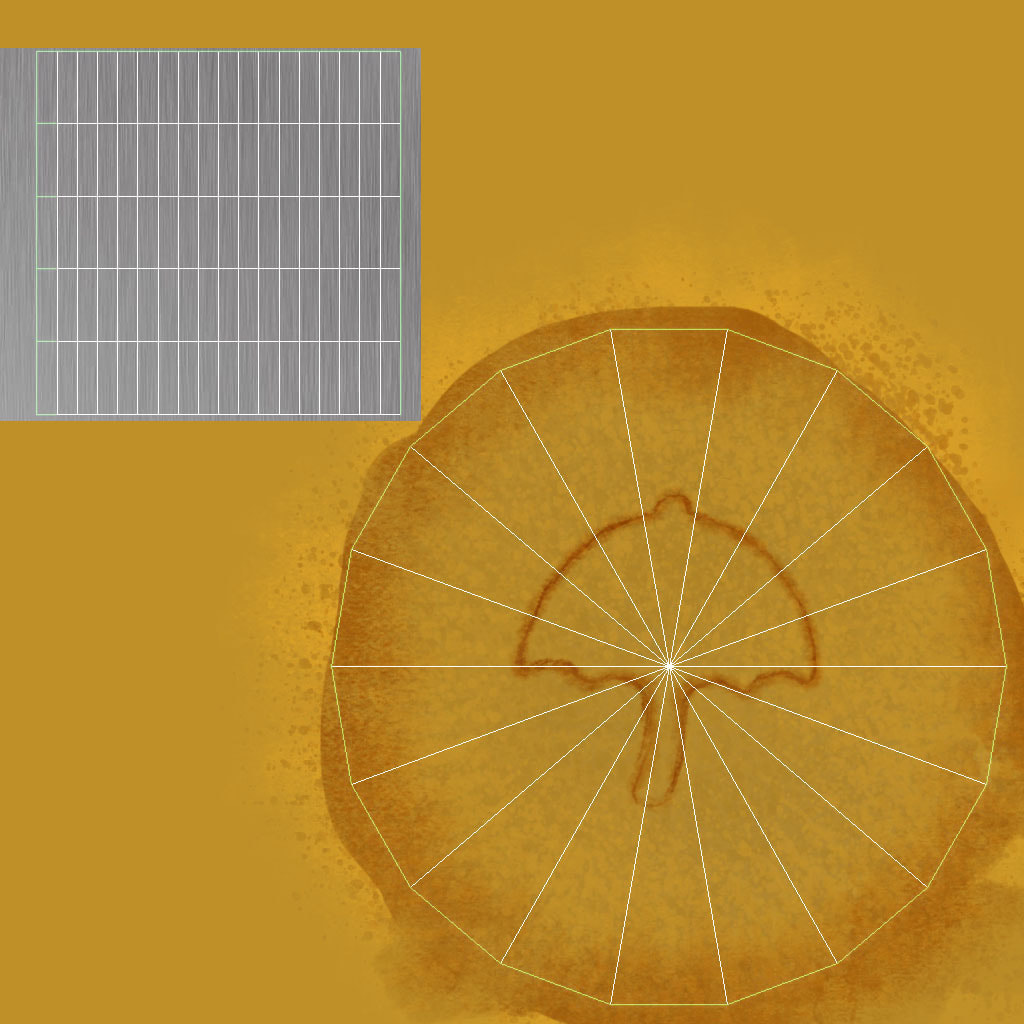
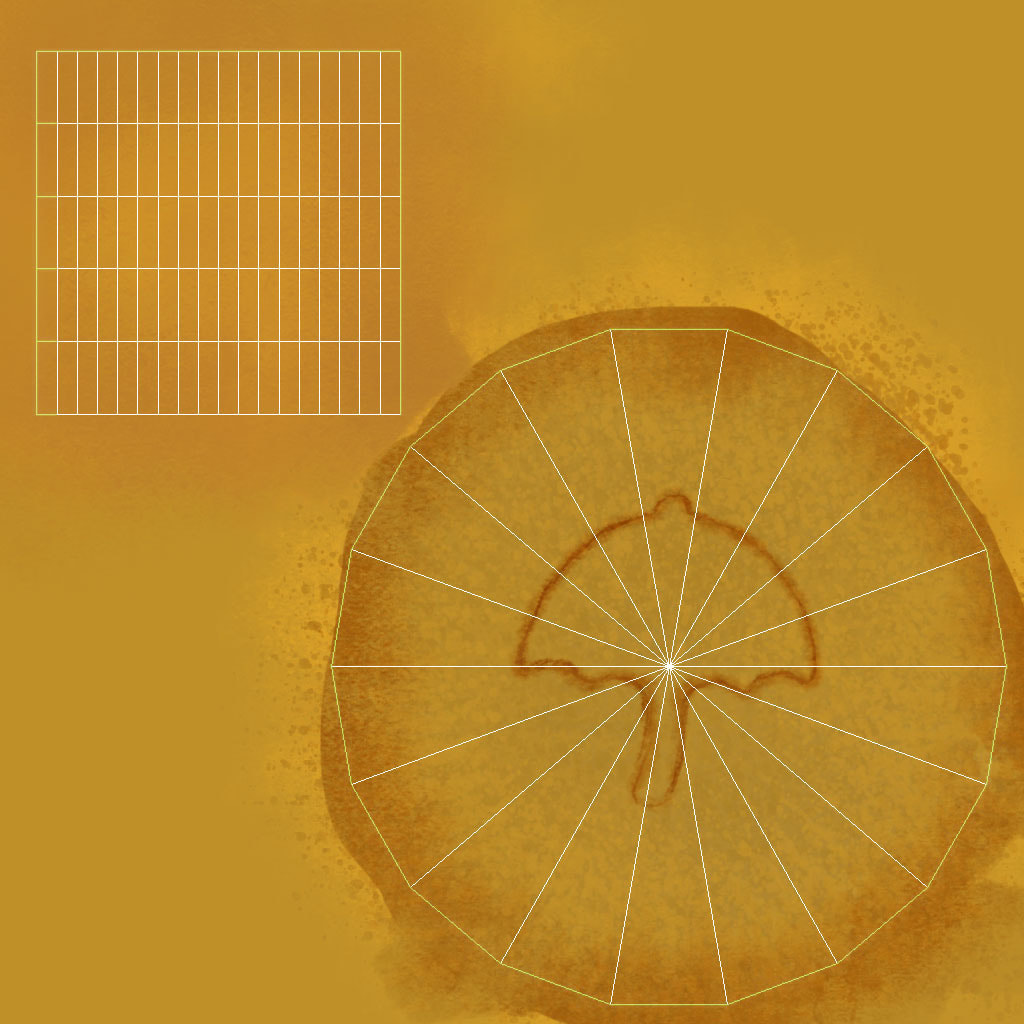
This past week has been a holiday for me - literally: I've been mostly making Easter eggs for Unreality, modeling and unwrapping assets in 3DS Max. Let's look at what I've done and the challenges I came across. I spent most of the last week in 3DS Max. This work largely revolved around editable polys. By manipulating polygons through tools such as extrude and inset, I was able to create good 3D models. Then, I used UVW unwrap modifiers to make texture mapping possible for the 2D artists. After creating a workable UVW render, I'd send a jpg or png off to a 2D artist to make the texture. Then, I'd ensure the texture looked good and lined up correctly. One issue I had related to UVW mapping and, in particular, to circles. It was difficult to select the correct faces of circular objects. For example, when making a texture map of the top of a jar, I couldn't drag the circular middle of the lid to a separate space without distorting the shape. I fixed this issue by changing the projection to a square map, so that the faces appeared circular in the UVW window. Another difficult aspect of this previous week was Wednesday. Having a virtual learning day without access to ample software posed a challenge to the entire team, disrupting our rhythm and hampering progress. However, that's not to say that nothing of importance was done this week. Through working with texture artists and ensuring the Easter eggs fit the game by working with the writer, I think it's safe to say I've done some solid work this week that also gels with the team's work as a whole. Next week, I look forward to wrapping up the Easter eggs and (perhaps) moving on to making scene areas for the final game. Wish me luck! 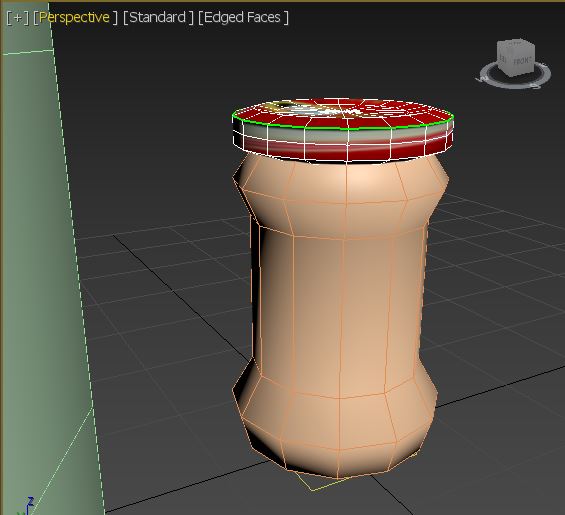 Face and texture manipúlation of editable poly objects
When working to develop Unreality last week, I faced a new barrage of various challenges and triumphs. It has been exciting to see our progress continue and to witness my work having an impact on the success of the Butter Cow Games team. As the main 3D modeler, I focused on - you guessed it - 3D models last week. More specifically, I worked almost exclusively in 3DS Max to create item models that will trigger cutscenes in Unreality. I used a variety of techniques to perfect a teddy bear, make a pill jar, and create a bear-proof trash bin. I did some UVW unwrapping, used editable polys, and worked with extended primitives. Additionally, I saved each item as an fbx file, which I then imported into Unity Game Engine to test out the viability of the items in game. First, I found success with the book model I made last week, applying a texture made by a 2D artist, which fit perfectly. Next, I encountered trouble with my teddy bear model: the nose and eye components removed their turbosmooth modifier when placed in Unity. I had a clever idea to fix this, though. When I had initially put on the nose and eye objects, I used the select and place tool and merely grouped them with the teddy bear model. I decided to remake the three face models, place them manually, and use the Boolean compound object to attach them with the teddy bear itself. 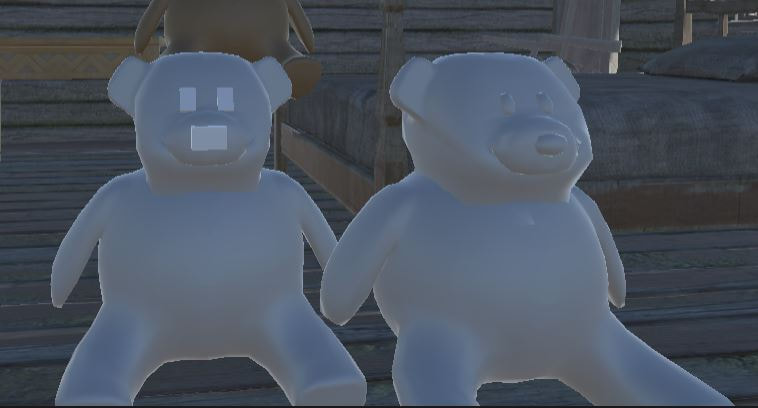 Before and after teddy bear turbosmooth fix 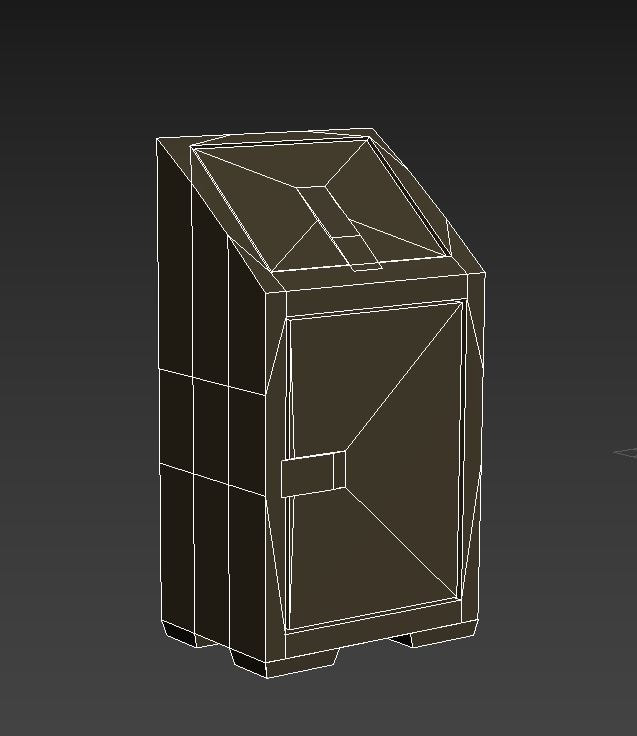 Trash bin model in edged faces view mode With some great progress under my belt, I'm looking forward to next week, where I'll focus on putting items into Unity. I'll prepare different areas to import into the main programmer's game scene which will house the finished product of Unreality. For now, though, my reality is real - and it carries excitement for continued progress.
Another week, another check-in! This week, I've mainly worked in 3DS Max to create item assets for Unreality. I also did some work within the Unity Game Engine to modify imported assets and prefabs. I'm not done with either item creation or scene design, but I've made progress with both this week. Within 3DS Max, I used various topology methods as well as editable polys, the turbosmooth modifier, and the symmetry modifier to create assets. Most recently, I made a teddy bear model. I also created an untextured book item to trigger a flashback, which I gave to a 2D artist to make a texture for. I did this in order to ensure a cohesive transition between game and cutscene environments. By communicating with animators and giving them some creative control over the items, Unreality can be a better game. Additionally, I communicated with team members in the Unity Game Engine when continuing to design a scene. The main writer and main programmer helped me to develop a scene that reflects both narrative and programming based plans. Next week, I will continue to cooperate with my group on making more progress. Next week, I'll do something similar to what I did this previous week. I will continue making models for the flashback cutscenes and adjusting the Unity scene to better fit the Unreality vision. I plan to complete all of the flashback trigger items next week so that I can get to work on really getting the map together. 3DS Max may be one of my favorite modeling softwares, but it still delivered some issues to me. Something I found very difficult to deal with was polygons moving in unpredictable manners. Extruding faces would cause strange movements in nearby faces, resulting in weird caved-in sections of my model. This was an issue particularly with the teddy bear model. To overcome this hurdle, I made the editable poly I was working in that was under a symmetry modifier into another editable poly. This let me more carefully manipulate individual polygons and limit unexpected errors. Through both the progress and the setbacks of this week, the team behind Unreality has made the accomplishment of solid progress all the way around. Everyone has done their part to do something that's going to be in the final game - 2D artists doing textures and starting on animations, the main writer fully fleshing out the narrative behind the flashback cutscenes, and the main programmer making headway on the game terrain. We are ready for what lies ahead and I can't wait to see our vision continue. 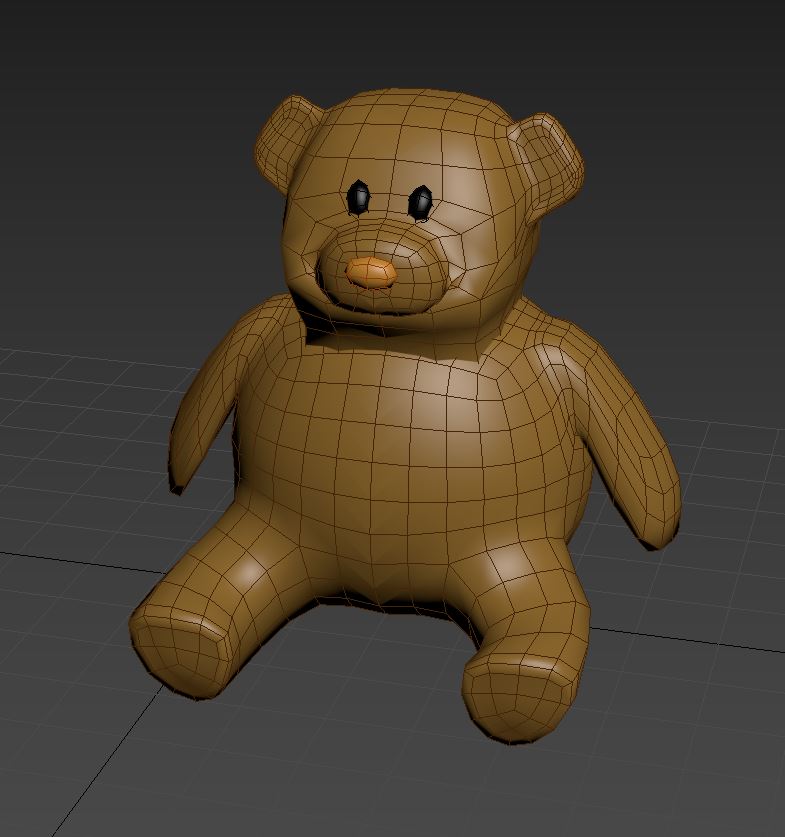 Teddy bear model in edged faces view mode
My group has started the production phase of Unreality, which is the title of our team game project. As the main 3D artist, I've been busy this week working with my teammates to design an environment. This week, I've focused on getting prefabs ready for placement in a scene and adding detail to parts of the game. I used free premade assets from the Unity Asset Store that I found on the Asset Research project during the pre-production phase in addition to newly found ones as well as making and customizing a few of my own. The main programmer, the main writer, and I divided some things that needed doing into roles for each other. The programmer began work on the terrain, the writer created a basic map for Unreality, and I was responsible for making the individual parts of the game. This incredibly vague category includes making cabin assets, vans, and abandoned structures to fulfill the apocalyptic mood of Unreality. I made my own prefabs through modular design, bringing together premade assets to sculpt original creations. Working with 2D artists, I made sure the textures of every object were optimal for our game. Now that I've outlined what I have done, I'll go through this week's plans. As the team leader of Butter Cow Games, I've made a meeting plan for this week's team meeting. I will give recommendations for what to work on for every team member, listening and taking into account their plans as well. I will focus on using 3DS Max to make items for Unreality. Hopefully, I'll get re-accustomed to the program fairly quickly and I won't have too many problems. I didn't run into many setbacks on the previous week's work, but I did experience a couple. Some file types of textures were hard to work with. I received error messages when importing from the Unity Asset Store. I fixed the file type issue through online resources to convert to a different type of file. I resolved the Unity errors through modifying the imported assets. But what about the team as a whole? What have we accomplished? Our greatest accomplishment this week as a team is a basic outline. We know what the game map is going to look like. We know the overall aesthetic of the game. We know that, although we're far from finished, that we have an idea of what Unreality will be - and that it's not an unrealistic vision.  Using modular design to create a prefab from a Unity Asset Store free asset
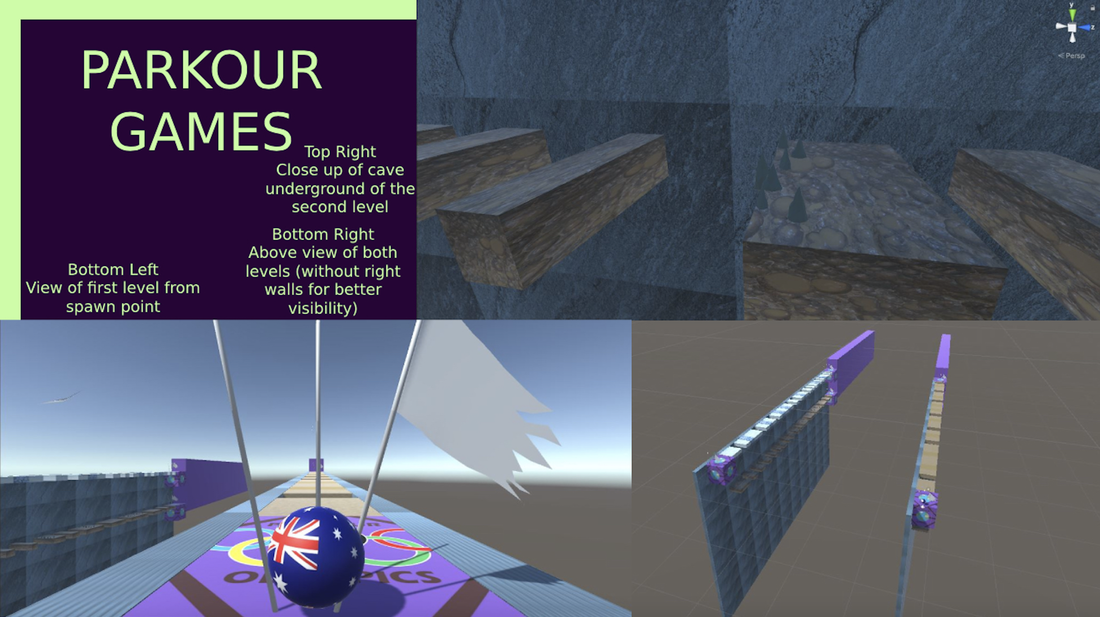
I've gotten to a working edition of the Parkour Games - the big project I've been ranting about on this page - but I'm far from finished. There are still missing features that I can't wait to add.
First, let's examine the respawn system. It has given me trouble for a while. Initially, it was especially troublesome with triggers and colliders and teleporting the trigger to a checkpoint instead of the player. I worked around the respawn issue by creating a level underneath the caves with arrows serving as signifiers to direct the player back to a starting point. However, I still want to do work on the respawn system, whether that means improving what I currently have or revamping my original idea to work more consistently. Although it would be nice to change the respawning mechanics, the most important thing to change is definitely the controls. I began development of the Parkour Games with a third person perspective in mind. However, during my process of simplifying the educational aspect, I switched to a first person view. I didn't change scripts or assets, though, I just swapped my player object with a camera object. I'd like to implement the built-in FPS controller into my game to have a more manageable movement and view panning system. Now, it's time to go over my level ideas. Right now, there are only the desert and tundra levels, but I'd like to add more. The forest and grasslands levels would be perfect additions, along with a final boss of sorts (i.e. a quiz on what biomes look like to polish off the educational aspect of Parkour Games). Hopefully, these additions coming soon will really help my game feel complete. Summary
A parkour game. Possible. An educational parkour game. Also possible. An educational parkour game geared towards kindergarten through 2nd grade? Maybe possible? Let's take a look at what I've managed to do this week about educating young children through parkour.
The educational aspect of my parkour game has evolved greatly since my prototype was published earlier this week. I changed many things, which I'll outline here. The most obvious change is certainly the shift away from countries. Initially, Parkour Games revolved around different countries competing to be the best at parkour. The player could select a country at the beginning of the game and have a third person look at a representation of the country to play as. That's been scrapped. I've changed the focus of the educational aspect from a scrambled, disjointed, fifth or sixth grade geography lesson to a basic biome activity. I also removed the continent screen from the instruction screens, as it was no longer necessary for my new focus. I changed the biome map from the falling instructions from a complicated, fourteen-biome mashup to a simple four biome image that's much easier for young kids to digest. It's a shame to see the country and continent stuff gone from my game - especially because I spent a lot of time creating textures, programming, and debugging features revolving around them - but it's definitely worth it. Taking into account my target audience and rethinking certain design decisions has led to a great outcome. Now, thanks to my adjustments, Parkour Games is a much simpler parkour game which I'm proud of. Summary
 During my development of a parkour game called The Parkour Games the past few weeks, I've done a lot of things in the Unity Game Engine. However, there's also been some problems in the process.
Firstly, the pre-production. I created a Google document and got all of my ideas down. Next, I designed levels on paper and did a brief Game Design Document outline. Then. I compiled a list of all textures, models, and scripts I needed. My initial step in production was texture creation. I found images and tweaked them in Adobe Photoshop for some textures. For others, I created my own. For instance, I found pictures of thin ice and sand, very similar obstacles in The Parkour Games, and adjusted image filters to make them stand out.. I didn't create any 3D models in 3DS Max, my 3D program of choice, but instead made everything in the Unity Game Engine. I also created multiple scripts in Windows Visual Studio, including a player controller and camera controller script. Now, the game itself. The main premise is that the player represents a country and tries to survive an intense game of parkour. The first level is the desert level. There are pitfalls and sand traps, which cause the player to fall into the cave height of the level. The caves have pitfalls, which teleport the player back to the beginning of the level. They also have stalagmites, which also send the player back. The ending of the level, white flags, sends the player to the second level, the tundra. There is snow and thin ice in the tundra, which act like the desert default and sand traps, respectively. Likewise, there are pitfalls and caves, but this level has more obstacles and is more difficult to complete. Issues are next up on the menu of this blog post. My main problem was a discrepancy of the camera script and player script, which I haven't resolved. Either the camera or player is always faster than the other, regardless of how I change speeds. I solved texture issues, rigidbody issues, and a problem with the camera not following the player down into the cave height. Overall, although I couldn't finish The Parkour Games, it was good to be back in Unity and to feel more prepared for the creation of my team game. Summary
Creating the UI of a game is one of the most crucial design decisions. It can be done in a wide array of methods that span across many different genres. Today, I'm going to step foot in the jungle of user interfaces and explore how some games I enjoy playing employ it. 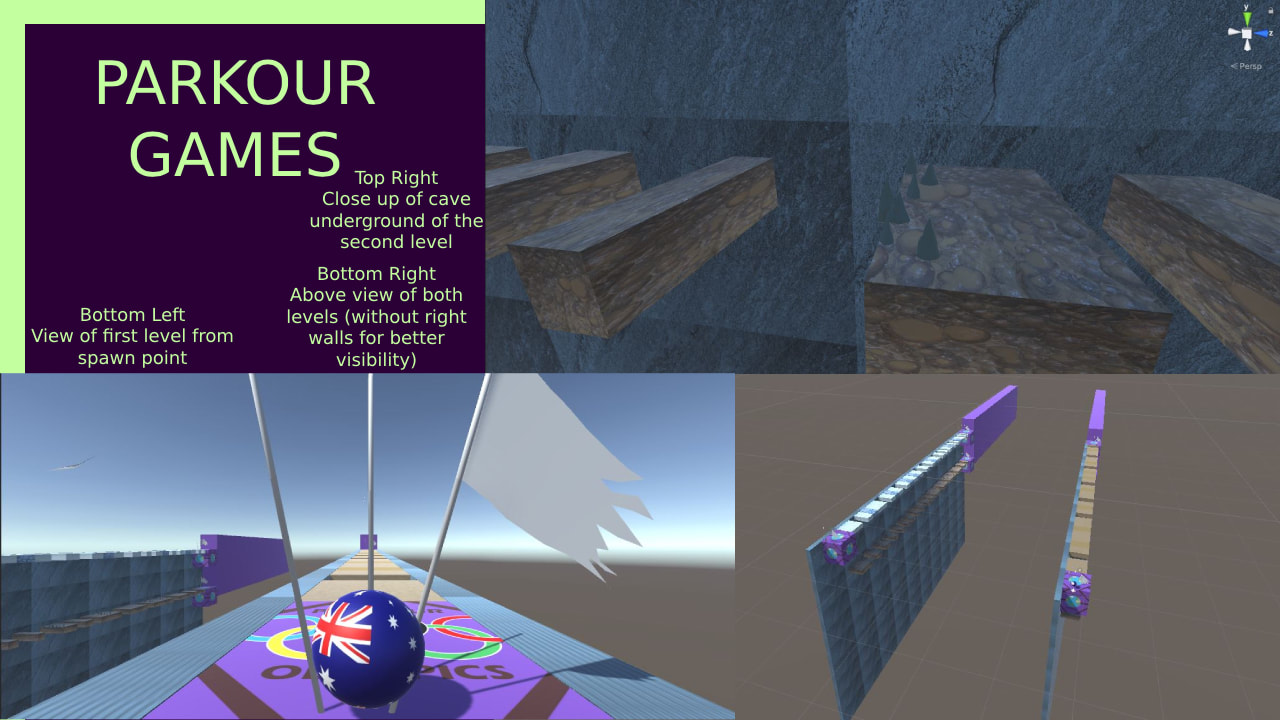 First, I'll launch an investigation into the uber-successful sandbox/adventure game available on all platforms: Minecraft. Its user interface is very simple, containing a health bar and inventory. This can help focus the player on playing the game instead of being distracted with a complex UI. However, a highlighted box surrounds the item the player is currently selecting. This prevents confusion surrounding which object is selected. Additionally, Minecraft added a hunger bar beside the health bar a few years ago, which lets the player understand the hunger mechanic by displaying how hungry they are. The UI is located in the center bottom of the screen to not obstruct gameplay while still being easily found.
Temple Run, another very popular game, is an adventure-ish infinite running game on mobile. The UI of Temple Run has three main components: the coin collection, the score indication, and the pause button. Each of these three are away from the center of the screen, each in a corner, which is imperative for a mobile game for good visibility. They also are stylized in the aesthetic of the game. The coin collection shows how many gold coins the player has collected. The score indication - you guessed it - indicates the score the player has earned. Finally, the pause button allows for the player to momentarily leave the game, another high importance thing for mobile. Star Wars Battlefront 2, available on consoles and computers, isn't nearly as well-selling as Temple Run or Minecraft, but it's a great example of a unique UI and it's a first person shooter game. The top of the screen shows information relating to the objective of the game: how many kills each team has, how many areas each team controls, etc. The bottom right displays items the player has and when they are available to use. The health bar, at the very bottom of the screen, shows how much health the player has. Above it lies more information: how fast a gun is overheating and indicating damage or kills. These are important elements to include in a game that includes guns. Lastly, in the bottom right, there's a minimap that includes the locations of nearby players. Summary
|
AuthorHI! I'm a 12th grader and on this page, I will blog about me and what I'm going through, both in Game Design class and in life. There are a mix of required blog posts and personal reflections, which you can sort, among other things, below the disclaimer and archives. DISCLAIMER
The views and opinions expressed in this blog are solely those of the author and do not represent those of Durham School of the Arts or Durham Public Schools. Archives
May 2022
Categories
All
|

 RSS Feed
